A background film is one of the simplest upgrades you can make to an aquarium. It hides cables and the wall behind the tank, adds depth, and makes plants, fish and hardscape stand out. Background films come in two types: self-adhesive and non-adhesive. Both are applied in exactly the same way, with a spray of mild soapy water, but they behave very differently once they touch the glass. This guide explains the difference, shows you the method step by step, and helps you get a smooth, bubble-free finish with a film such as LGND Gradient BackScreen™.
The short version
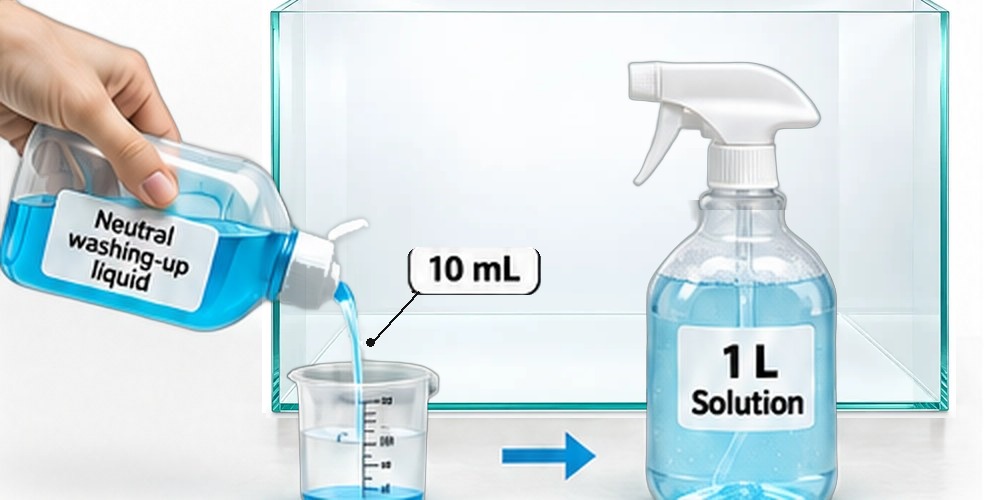
- Mix 10 mL of neutral washing-up liquid with 1 litre of water in a spray bottle.
- Clean the outside of the rear glass and spray it evenly.
- Peel off the backing liner slowly while spraying the back of the film.
- Place the film on the wet glass, blue at the top, and line it up.
- Squeeze out the liquid and air from the centre towards the edges, trim the excess and let it dry.
Adhesive film: gets the position right first time, because corrections are difficult once it grips. Non-adhesive film: can be lifted and reapplied as often as you need until the finish is perfect.
In this guide
Adhesive or non-adhesive: what is the difference?
Both types are supplied with a protective backing liner and both are applied wet. The difference is what happens after the film meets the glass.
| Self-adhesive film | Non-adhesive film | |
|---|---|---|
| Application | Wet, with soapy water | Wet, with soapy water |
| Adjusting the position | Only while it is still wet, and only by sliding | Can be lifted and reapplied as many times as needed |
| Removing bubbles | Must be done carefully during the first application | Easy: lift the section, re-wet and smooth again |
| Hold once dry | Very firm, long-term | Held by the thin layer between film and glass |
| Removal | Peel slowly; not intended for reuse | Peels off easily and can be reapplied |
| Best for | A permanent background on a display you will not change | First-time installers, rescapes and aquariums that may be moved |
Which one should I choose? If this is your first background film, or you like to change your layout, the non-adhesive type is the most forgiving. If you want a background that stays perfectly in place for years, choose the self-adhesive type and take your time over the positioning.
What you need
- Your background film, for example LGND Gradient BackScreen™
- A spray bottle with mild soapy water (see the table below)
- A soft rubber squeegee or a triangle ruler
- A clean, lint-free cloth and a measuring tape
- A sharp cutter knife or scissors
- A towel to protect the aquarium stand
How to mix the solution
Use roughly a 1% solution of neutral washing-up liquid. It lets the film slide into place and helps you push out every last bubble. Too little and the film grabs too early; too much and it takes longer to settle.
| Water | Neutral washing-up liquid |
|---|---|
| 500 mL | 5 mL |
| 1 litre | 10 mL |
| 2 litres | 20 mL |
Safety first. The film goes on the outside of the rear glass only. Keep the solution out of the aquarium and away from sockets, plugs and electrical equipment. Never move or tilt a filled aquarium to reach the back, and keep the film and packaging away from children.
Before you start
- Measure the exposed rear glass, excluding frames and silicone joints, and check the film size against it.
- Work at 15–25 °C. Above 30 °C the solution dries too fast; in a cold room an adhesive film grips less well.
- Turn the empty aquarium so the rear glass faces you. Working on a panel you can see head-on is far easier and gives a cleaner result. In the photos below, the panel facing the camera is the rear glass, seen from outside.
- Make sure you can reach the whole panel. For films longer than about 90 cm, a second pair of hands makes the job much easier.
- Work in a dust-free area. Every speck trapped under the film will show once the light is on.
Step by step
These steps are the same for both types of film.
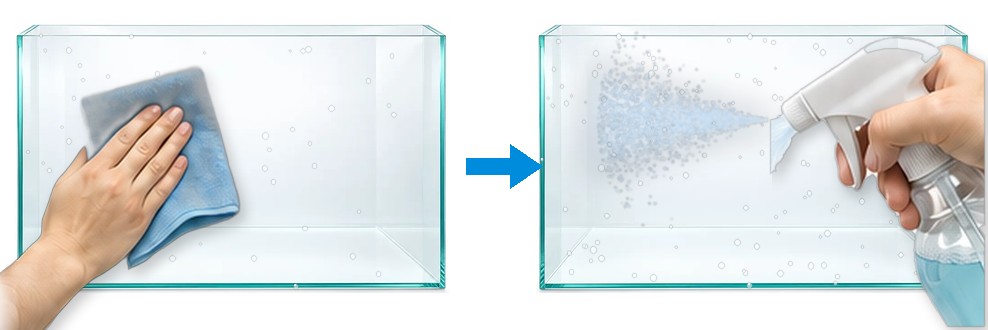
- Clean and spray the glassWith the rear panel facing you, remove dust, fingerprints and mineral marks from its outside surface, then spray the solution evenly over the whole surface.
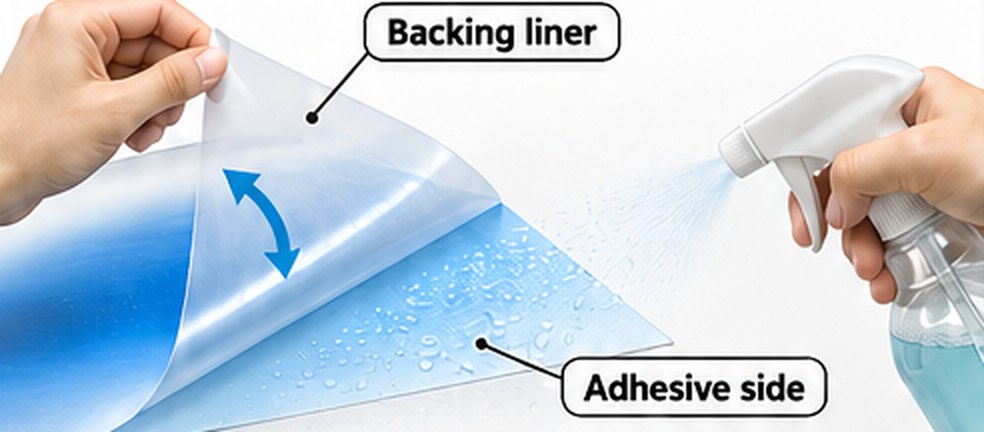
- Peel the liner and wet the filmPeel the backing liner away slowly while spraying the exposed side of the film. Keep it free from dust and fingerprints, and do not let it fold onto itself.
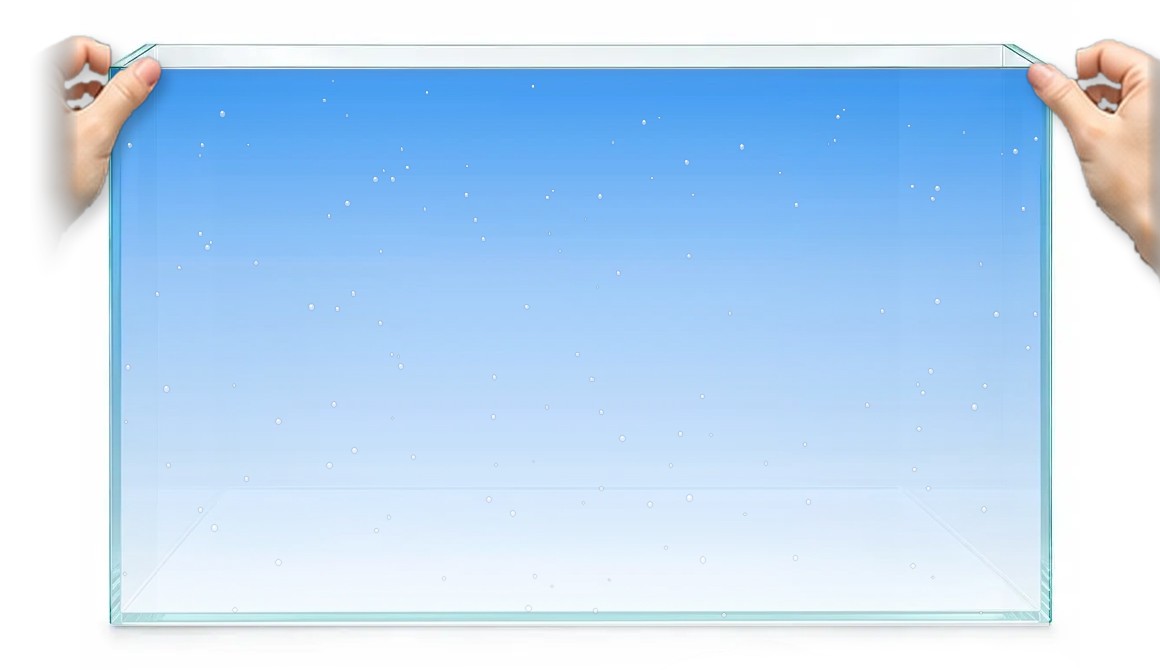
- Position the filmPlace the wet side against the wet glass, blue at the top and white at the bottom. Align the top edge first, then slide the film until it is level. Keep it clear of silicone joints and frames.
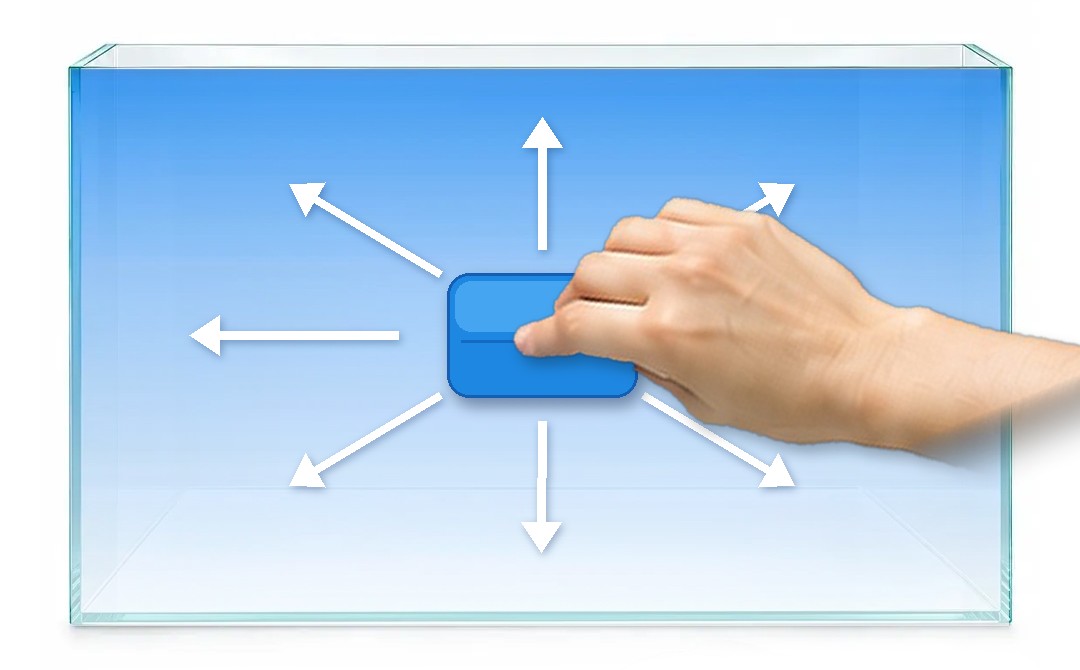
- Smooth from the centre outwardsHold the film in place and start with one stroke from the top edge straight down the middle. Then use the squeegee or triangle ruler to push the liquid and air from the centre out towards the nearest edge. Use overlapping strokes and light, even pressure, and avoid catching the film with the corner of the tool.
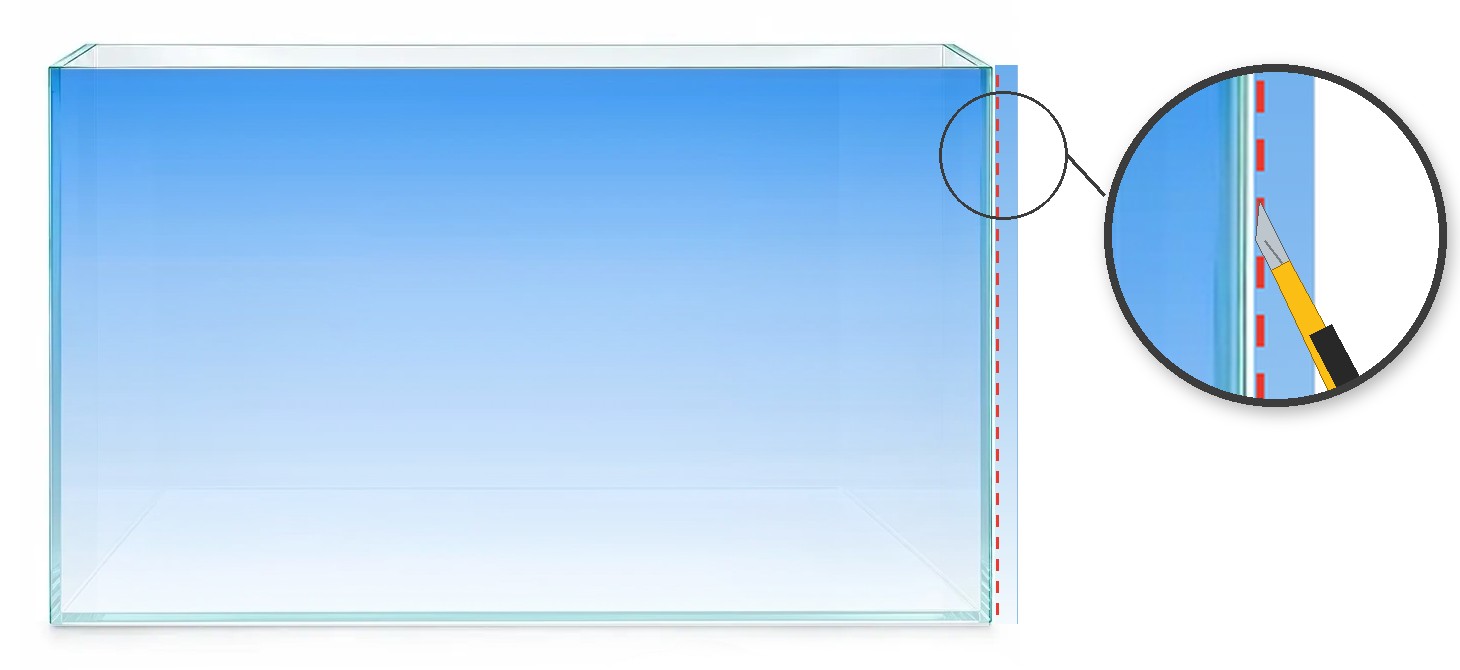
- Trim the excessOnce the film lies flat, hold the overhang taut with your free hand and trim it along the edge of the glass in one smooth pass with a sharp cutter knife, keeping the blade away from the silicone seals. If the glass has bevelled edges, trim the film so it sits only on the flat glass: film left on a bevel is the first part to lift.
- Let it dryWipe away the expelled liquid and let the rest dry naturally. A few tiny bubbles or fine wrinkles at this stage are normal; they fade as the remaining moisture dries out over the next few days, and you can carry on setting up the aquarium in the meantime. Once the aquarium is back in position, check the background from the front with the lights on and smooth out anything you missed.
Working with a self-adhesive film
An adhesive film gives the firmest, longest-lasting result, but it rewards patience.
- Get the position right before you press. While the glass and adhesive are wet, the film can still slide. Once you start squeezing out the liquid, the adhesive begins to grip and corrections become difficult.
- Be generous with the solution. Spray both the glass and the adhesive side well; it buys you time to align the film.
- Deal with bubbles straight away. Work them out to the edge during the first pass; they are much harder to move once the adhesive has set.
- Adjust for temperature. Above 30 °C, add a little more washing-up liquid so the solution does not dry too quickly. In a cold room, warm the film gently with a hair dryer to help the adhesive grip, without overheating it.
Working with a non-adhesive film
A non-adhesive film is the most forgiving way to get a flawless finish.
- Lift and reapply as often as you need. If the film is crooked, a bubble will not move or a speck of dust is trapped, peel back that section, re-wet the glass and the film, and smooth it down again.
- Work in sections on larger tanks. Fix the top edge first, then smooth the film downwards a section at a time, lifting and re-laying any area that is not perfect.
- Squeeze out as much liquid as possible. The film holds best when only a very thin layer remains between film and glass. On very large tanks, a strip of clear tape along the top edge gives extra security.
- Keep the film for later. When you rescape or move the aquarium, peel it off, rinse it, let it dry flat and protect it from dust until you reapply it.
Troubleshooting
| Problem | Likely cause | What to do |
|---|---|---|
| Bubbles | Liquid or air left under the film | Push them to the nearest edge while still wet. Non-adhesive: lift, re-wet and smooth again. Never puncture the film. |
| Small specks | Dust on the glass or film | Non-adhesive: lift the section, remove the particle, re-wet and smooth. Adhesive: clean more thoroughly before the next installation. |
| Film grabs too early | Not enough solution, or it dried too fast | Spray more generously and add a little more washing-up liquid in a warm room. |
| Edges lifting | Edge resting on the frame or silicone, or liquid left at the edge | Trim the film inside the frame and squeeze out the remaining liquid towards the edge. |
| Creases | Film folded or stretched while positioning | Unroll it flat before you start and never stretch it into place. |
Removing the background
Peel the film away slowly from one corner, keeping it close to the glass rather than pulling it straight out. Clean any residue from the glass with soapy water. A non-adhesive film can be rinsed, dried and reapplied; a self-adhesive film is not intended for reuse once it has been removed.
A clean blue-to-white backdrop in eight sizes

Frequently asked questions
Can I apply a background film to an aquarium that is already running?
Yes, as long as you can safely reach the whole rear panel. Keep the solution outside the aquarium and away from electrical equipment, and never move or tilt a filled tank to gain access.
Why use soapy water instead of plain water?
The washing-up liquid lets the film slide on the glass instead of grabbing straight away. That gives you time to line it up and makes it easier to push out air and liquid.
Will the background look bubbly once it dries?
Not if the liquid and air are squeezed out properly. Small amounts of moisture dry out over time. Larger pockets should be pushed to the edge while the film is still wet.
Which way up does a gradient background go?
Blue at the top and white at the bottom. Trimming the top or bottom changes the balance of the two colours, so decide which part of the gradient you want to keep before you cut.
Does a background film need a background light?
No. It works as a decorative backdrop on its own. A background light shining through the film makes the gradient brighter and gives the aquarium more depth.
Can I reuse a background film after moving the aquarium?
A non-adhesive film can be peeled off, rinsed, dried flat and reapplied. A self-adhesive film is designed to stay in place and is not intended for reuse.
Not sure which size or type suits your aquarium? Send us your tank dimensions and we will help you choose.
AquaCoffeeShop: aquarium care made simple.